
Set Up Arduino IDE
If you already know Arduino or C++, this route will probably feel more natural.
For the main FreedomSTEM lessons, we still recommend Thonny + MicroPython, but Arduino IDE is a perfectly good extra option.
What you need
- your RP2040-Zero
- a USB cable that fits it
- a computer
- Arduino IDE installed
Step 1: Install Arduino IDE
Go to the Arduino website and install the version for your computer.
Step 2: Add RP2040 board support
The simplest route for many RP2040 boards is the arduino-pico core.
Board manager URL:
https://github.com/earlephilhower/arduino-pico/releases/download/4.5.2/package_rp2040_index.json
To add it:
- Open Arduino IDE
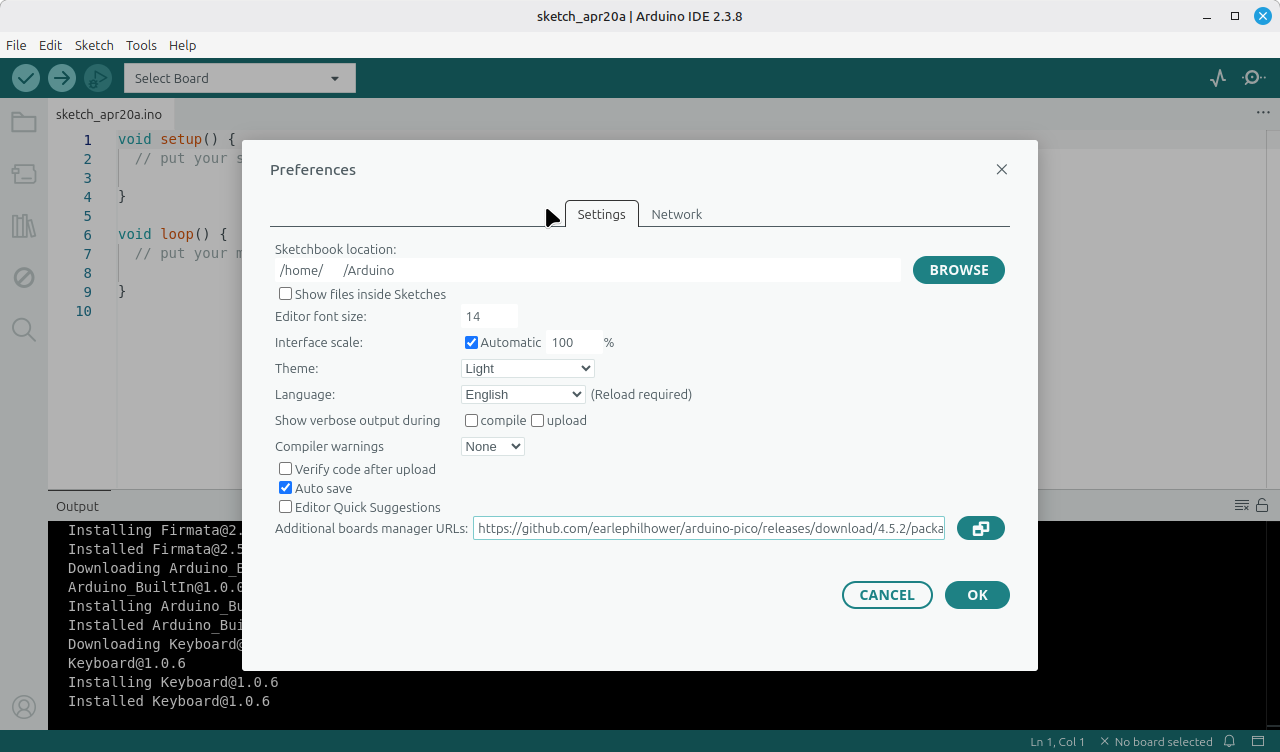
- Go to
File > Preferences - Find Additional Boards Manager URLs
- Paste the URL above
Step 3: Connect your board
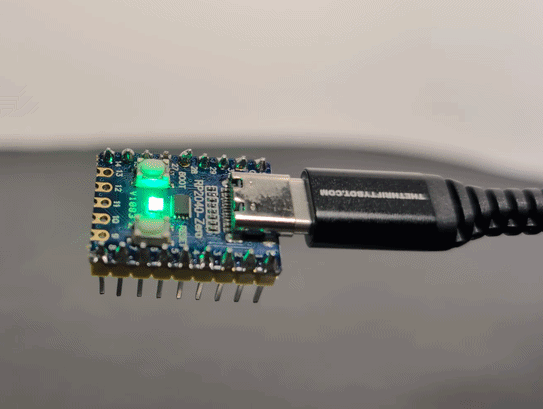
Hold down the BOOT button while you plug the RP2040-Zero into your computer. It should show up as a USB drive. If it doesn't work, press and hold BOOT, click RESET, and release BOOT.
In the main page, click Select Board. Click the option for an Unknown UF2_Board.
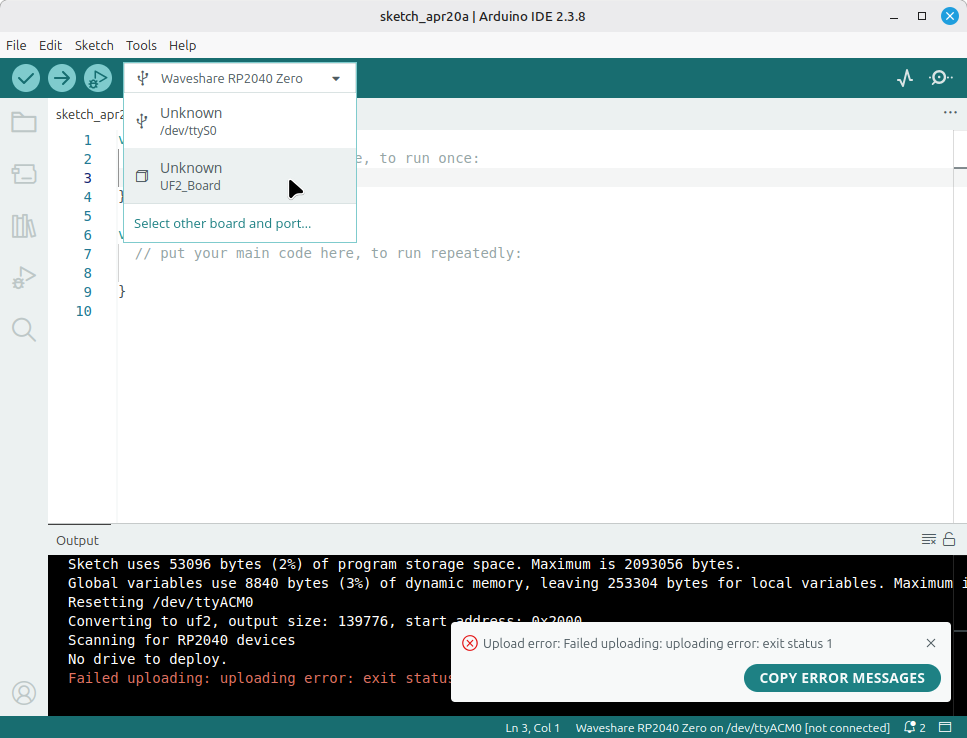
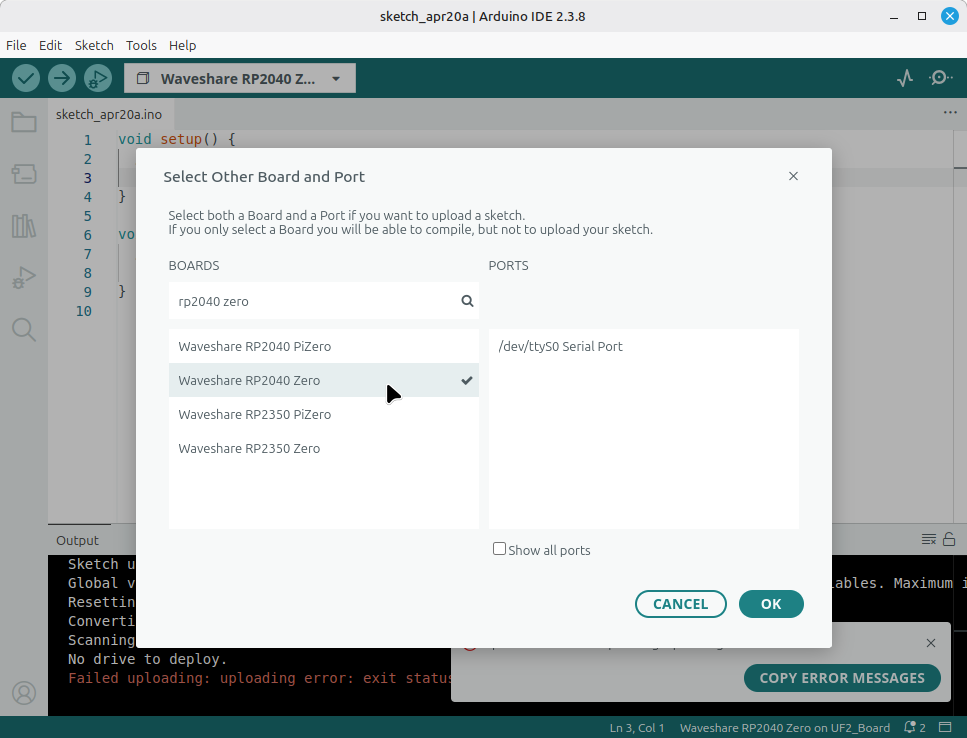
Then, search for rp2040 zero and select the Waveshare RP2040 Zero option. Click OK
Step 5: Test with Blink
For a first test, we'll use the built-in LED
- Open the library manager on the left bar.
- Search for and install
Adafruit NeoPixel.
- Next, copy the below code and click
Upload.
If the upload fails, your board probably isn't in upload mode. Hold down the
BOOTbutton while you plug the RP2040-Zero into your computer. It should show up as a USB drive. If it doesn't work, press and holdBOOT, clickRESET, and releaseBOOT.
#include <Adafruit_NeoPixel.h>

// The RP2040-Zero RGB LED is on Pin 16
#define PIN        16
#define NUMPIXELS  1

Adafruit_NeoPixel pixels(NUMPIXELS, PIN, NEO_GRB + NEO_KHZ800);

void setup() {
  pixels.begin(); // Initialize the NeoPixel object
}

void loop() {
  pixels.clear();

  // Red
  pixels.setPixelColor(0, pixels.Color(150, 0, 0));
  pixels.show();
  delay(500);

  // Green
  pixels.setPixelColor(0, pixels.Color(0, 150, 0));
  pixels.show();
  delay(500);

  // Blue
  pixels.setPixelColor(0, pixels.Color(0, 0, 150));
  pixels.show();
  delay(500);
}
If upload does not work
Try these checks:
- Make sure the USB cable supports data
- Double-check the selected port
- Double-check the selected board
- Unplug and reconnect the board
- Try the board's boot button method if needed for first-time flashing
Important note for this curriculum
The main project pages in this kit use MicroPython examples, not Arduino sketches. If you choose Arduino IDE, you will need to translate some of those ideas into Arduino-style C++.