Set Up Thonny
For this kit, Thonny is the easiest place to start. It is simple, reliable, and works well with MicroPython on the RP2040-Zero.
If you have used Arduino or C++ before, you may also want the Arduino IDE setup page.
Once Thonny is working, the next helpful stop is Coding.
What is an IDE?
IDE stands for Integrated Development Environment. In plain language, it is the app where you:
- write code
- run code
- fix mistakes
- send code to your board
What you need
- your RP2040-Zero
- a USB cable that fits it
- a computer
- internet access to download Thonny
Step 1: Install Thonny
Go to the Thonny website and install the version for your computer. For more help, use the Thonny GitHub Wiki
- Windows: install the Windows version
- Mac: install the macOS version
- Linux: use the version that matches your system
Step 2: Plug in your board
Connect the RP2040-Zero to your computer with the USB cable.
The first time you plug it in, your computer may take a moment to recognize it.
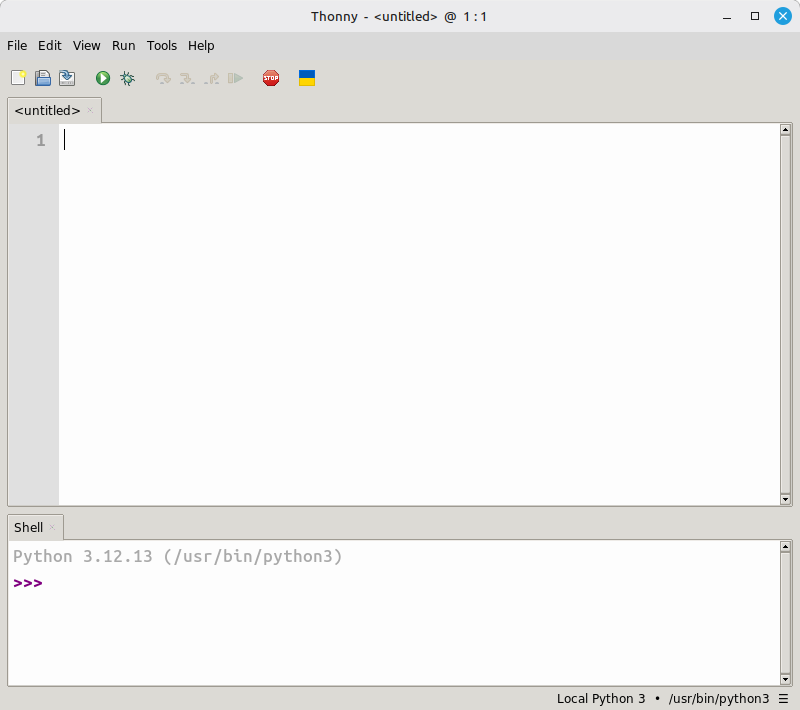
Step 3: Open Thonny
When Thonny opens, you should see:
- a place to type code
- a run button
- a shell area for messages
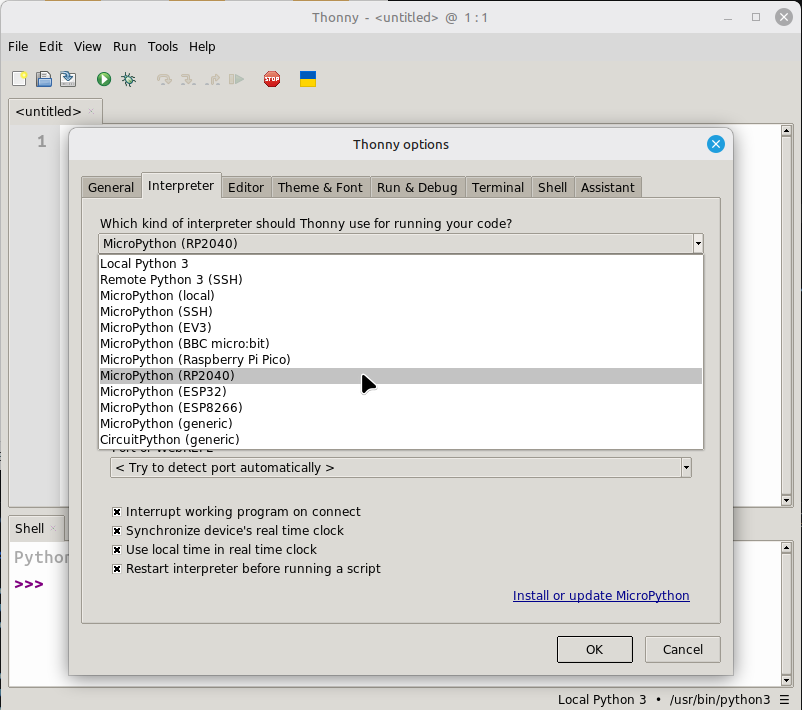
Step 4: Choose MicroPython for the board
In Thonny, go to Run > Configure interpreter... and choose MicroPython (RP2040).
That tells Thonny which kind of board it should talk to.

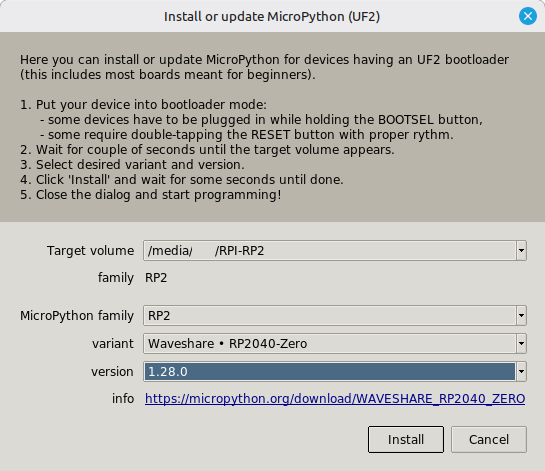
Step 5: Install MicroPython on your RP2040
Note: if you have programmed your RP2040 with Thonny before, you probably already did this step and can skip to step 6
Brand new RP2040 boards need to be set up once to work with MicroPython. To do this, click Install or update MicroPython on the Configure interpreter window.
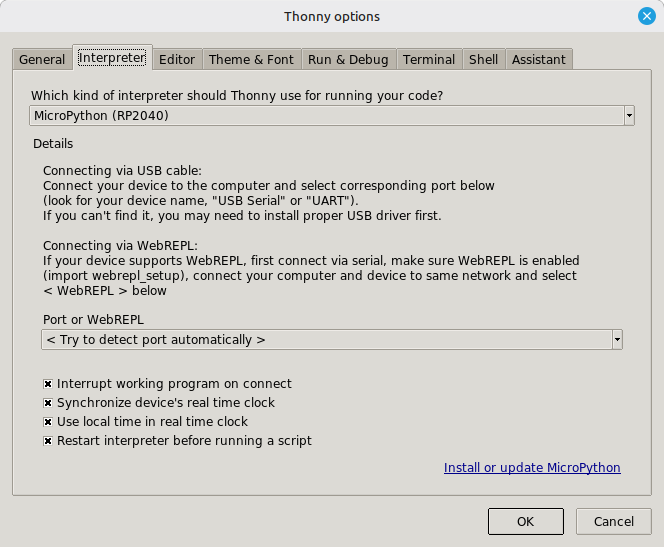
Once you click install, a new window will pop up. Select the following options:
- MicroPython family:
RP2 - variant:
Waveshare - RP2040-Zero - version: [leave the default value]
Then, click install. The process might take a few minutes.
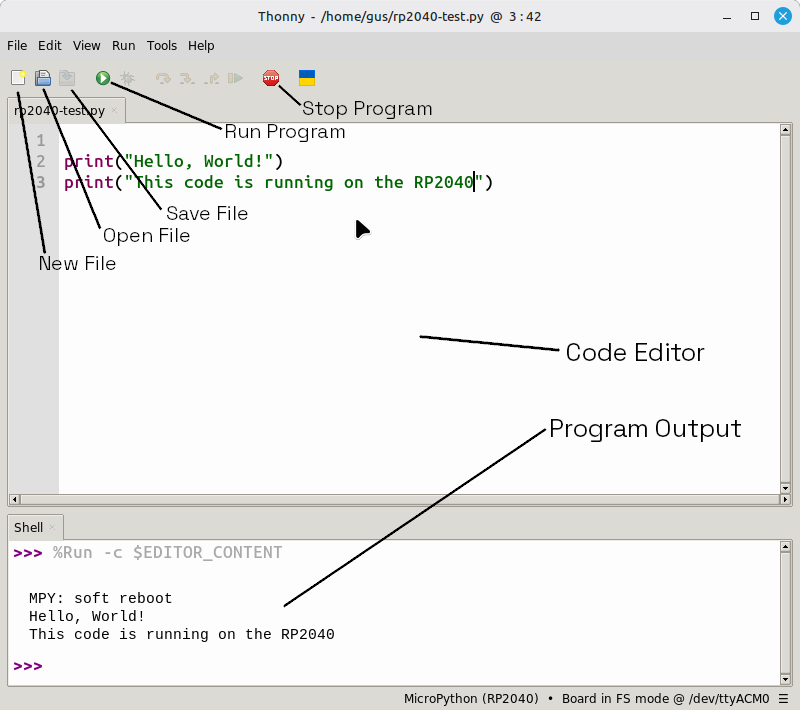
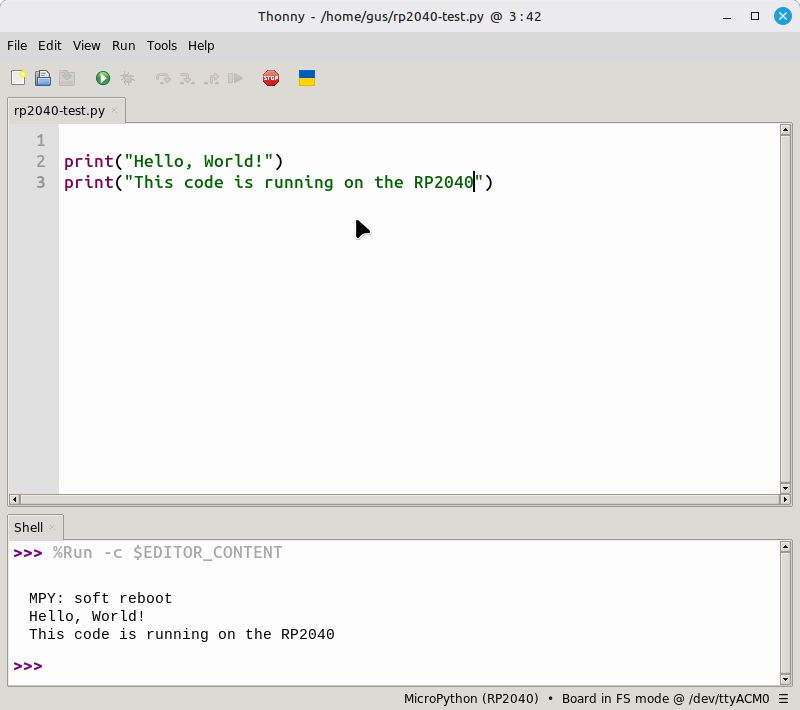
Step 5: Test with a tiny program
Paste this code into Thonny:
print("Hello, World!")
print("This code is running on the RP2040")
Click Run. If everything is connected correctly, you should see the message appear in the shell.
Step 6: Save code to the board
When you save, Thonny may ask whether to save the file:
- on the computer
- on the RP2040 board
If you want the board to run the file by itself later, saving to the board is the better choice.
If the board is not showing up
Try these checks:
- Make sure the USB cable can carry data, not just power
- Unplug the board and plug it back in
- Close and reopen Thonny
- Try a different USB port
- Try a different cable if you have one
Good habit
Give your files clear names, like blink.py or reaction_timer.py. That makes it much easier to find your work later.