
Meet Your Kit
Before building much, it helps to know what the parts are and what job each one does.
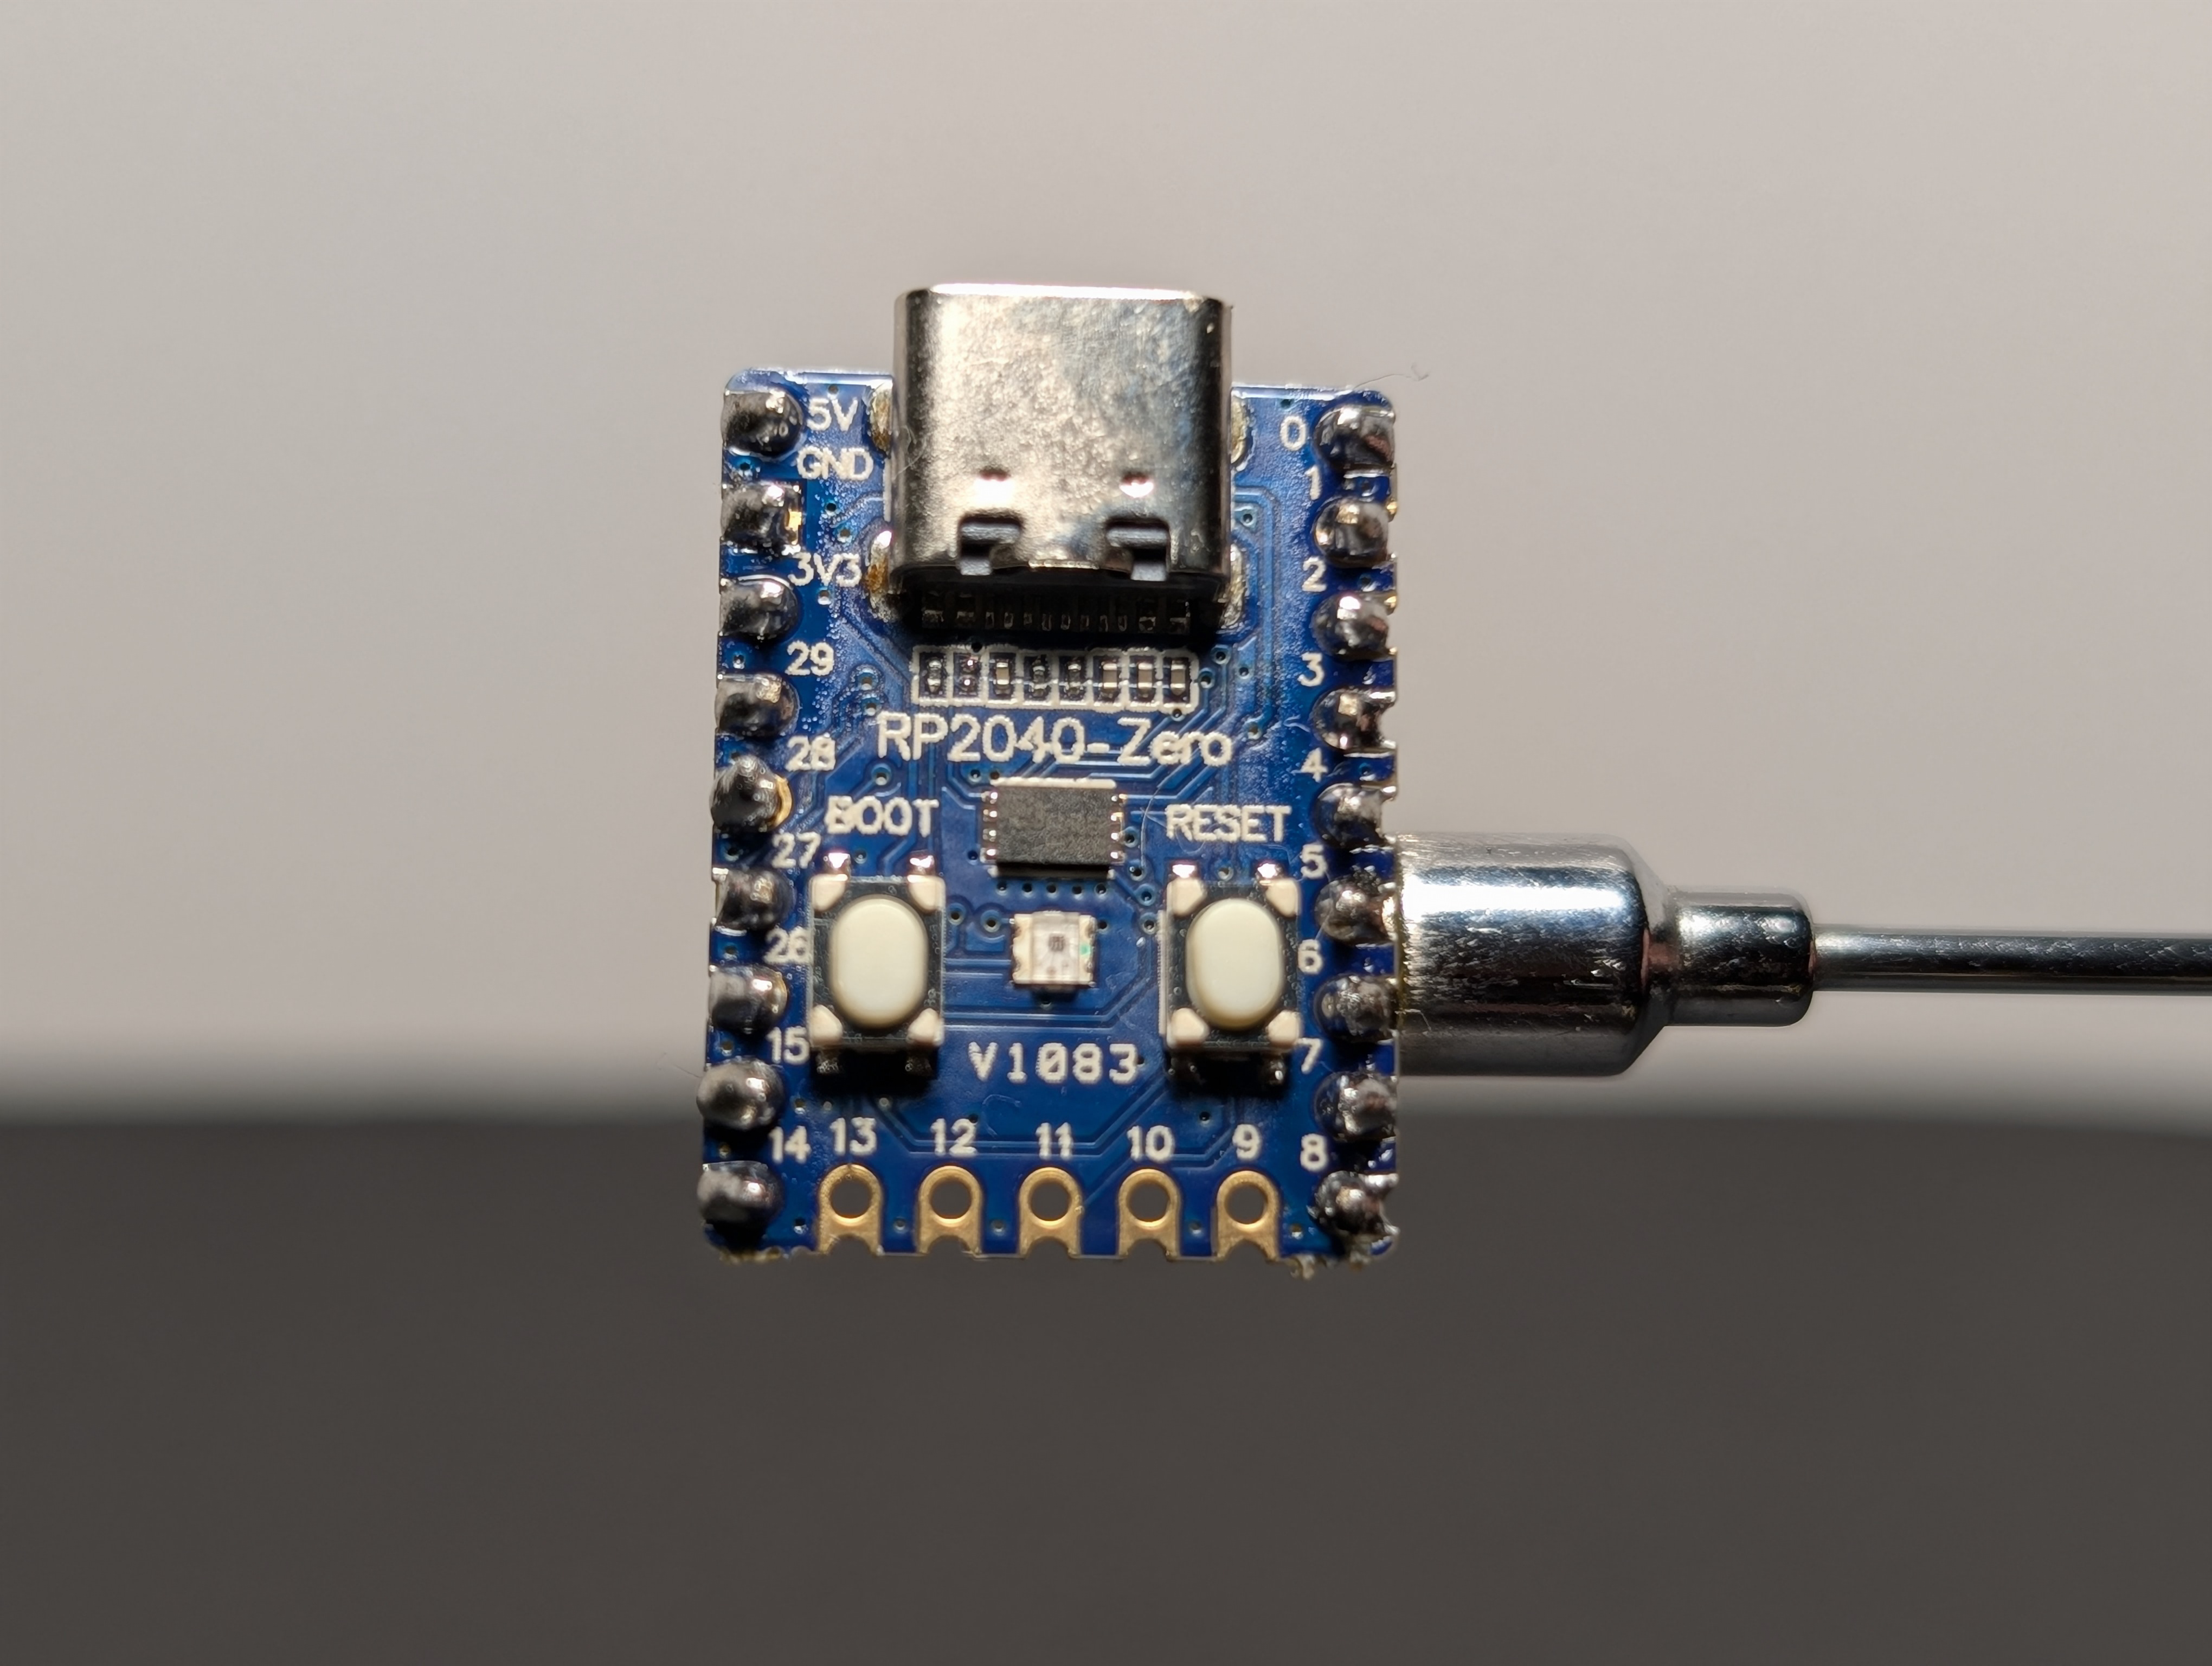
RP2040-Zero
The RP2040-Zero is the small computer in your kit. It can:
- turn pins on and off
- read buttons
- run code you write
- control LEDs and other parts
It is the brain of the project.
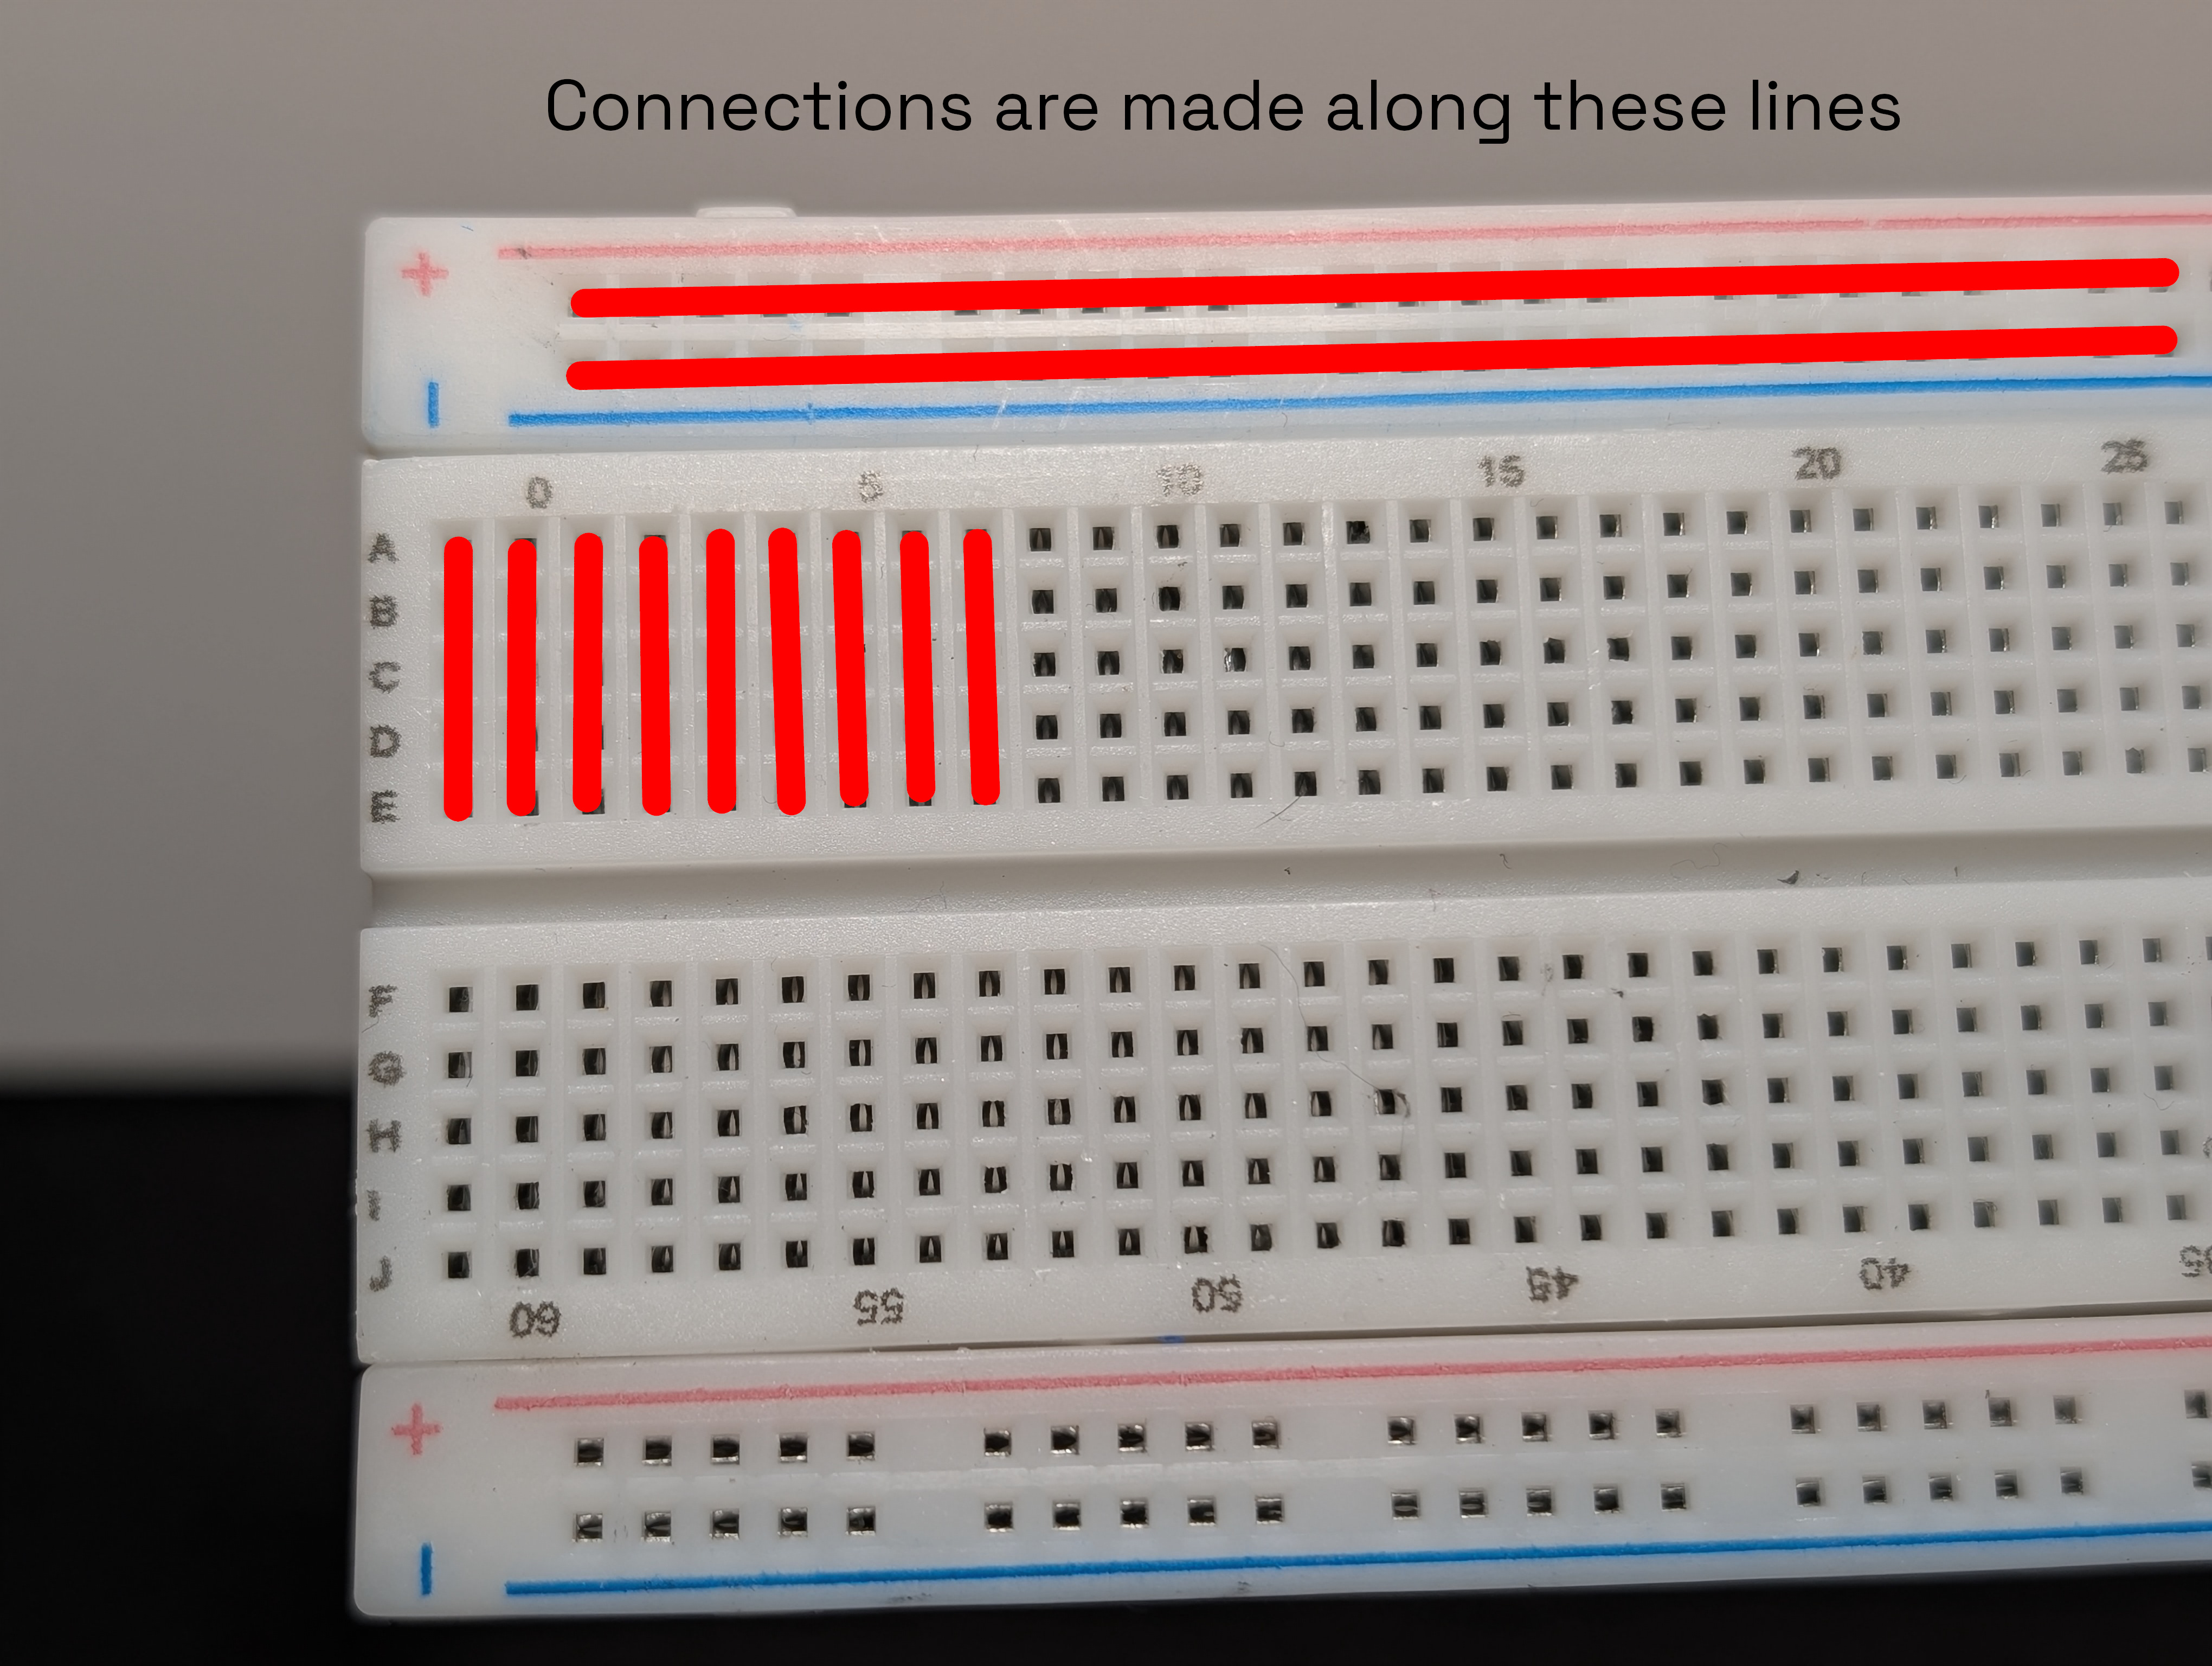
Breadboard
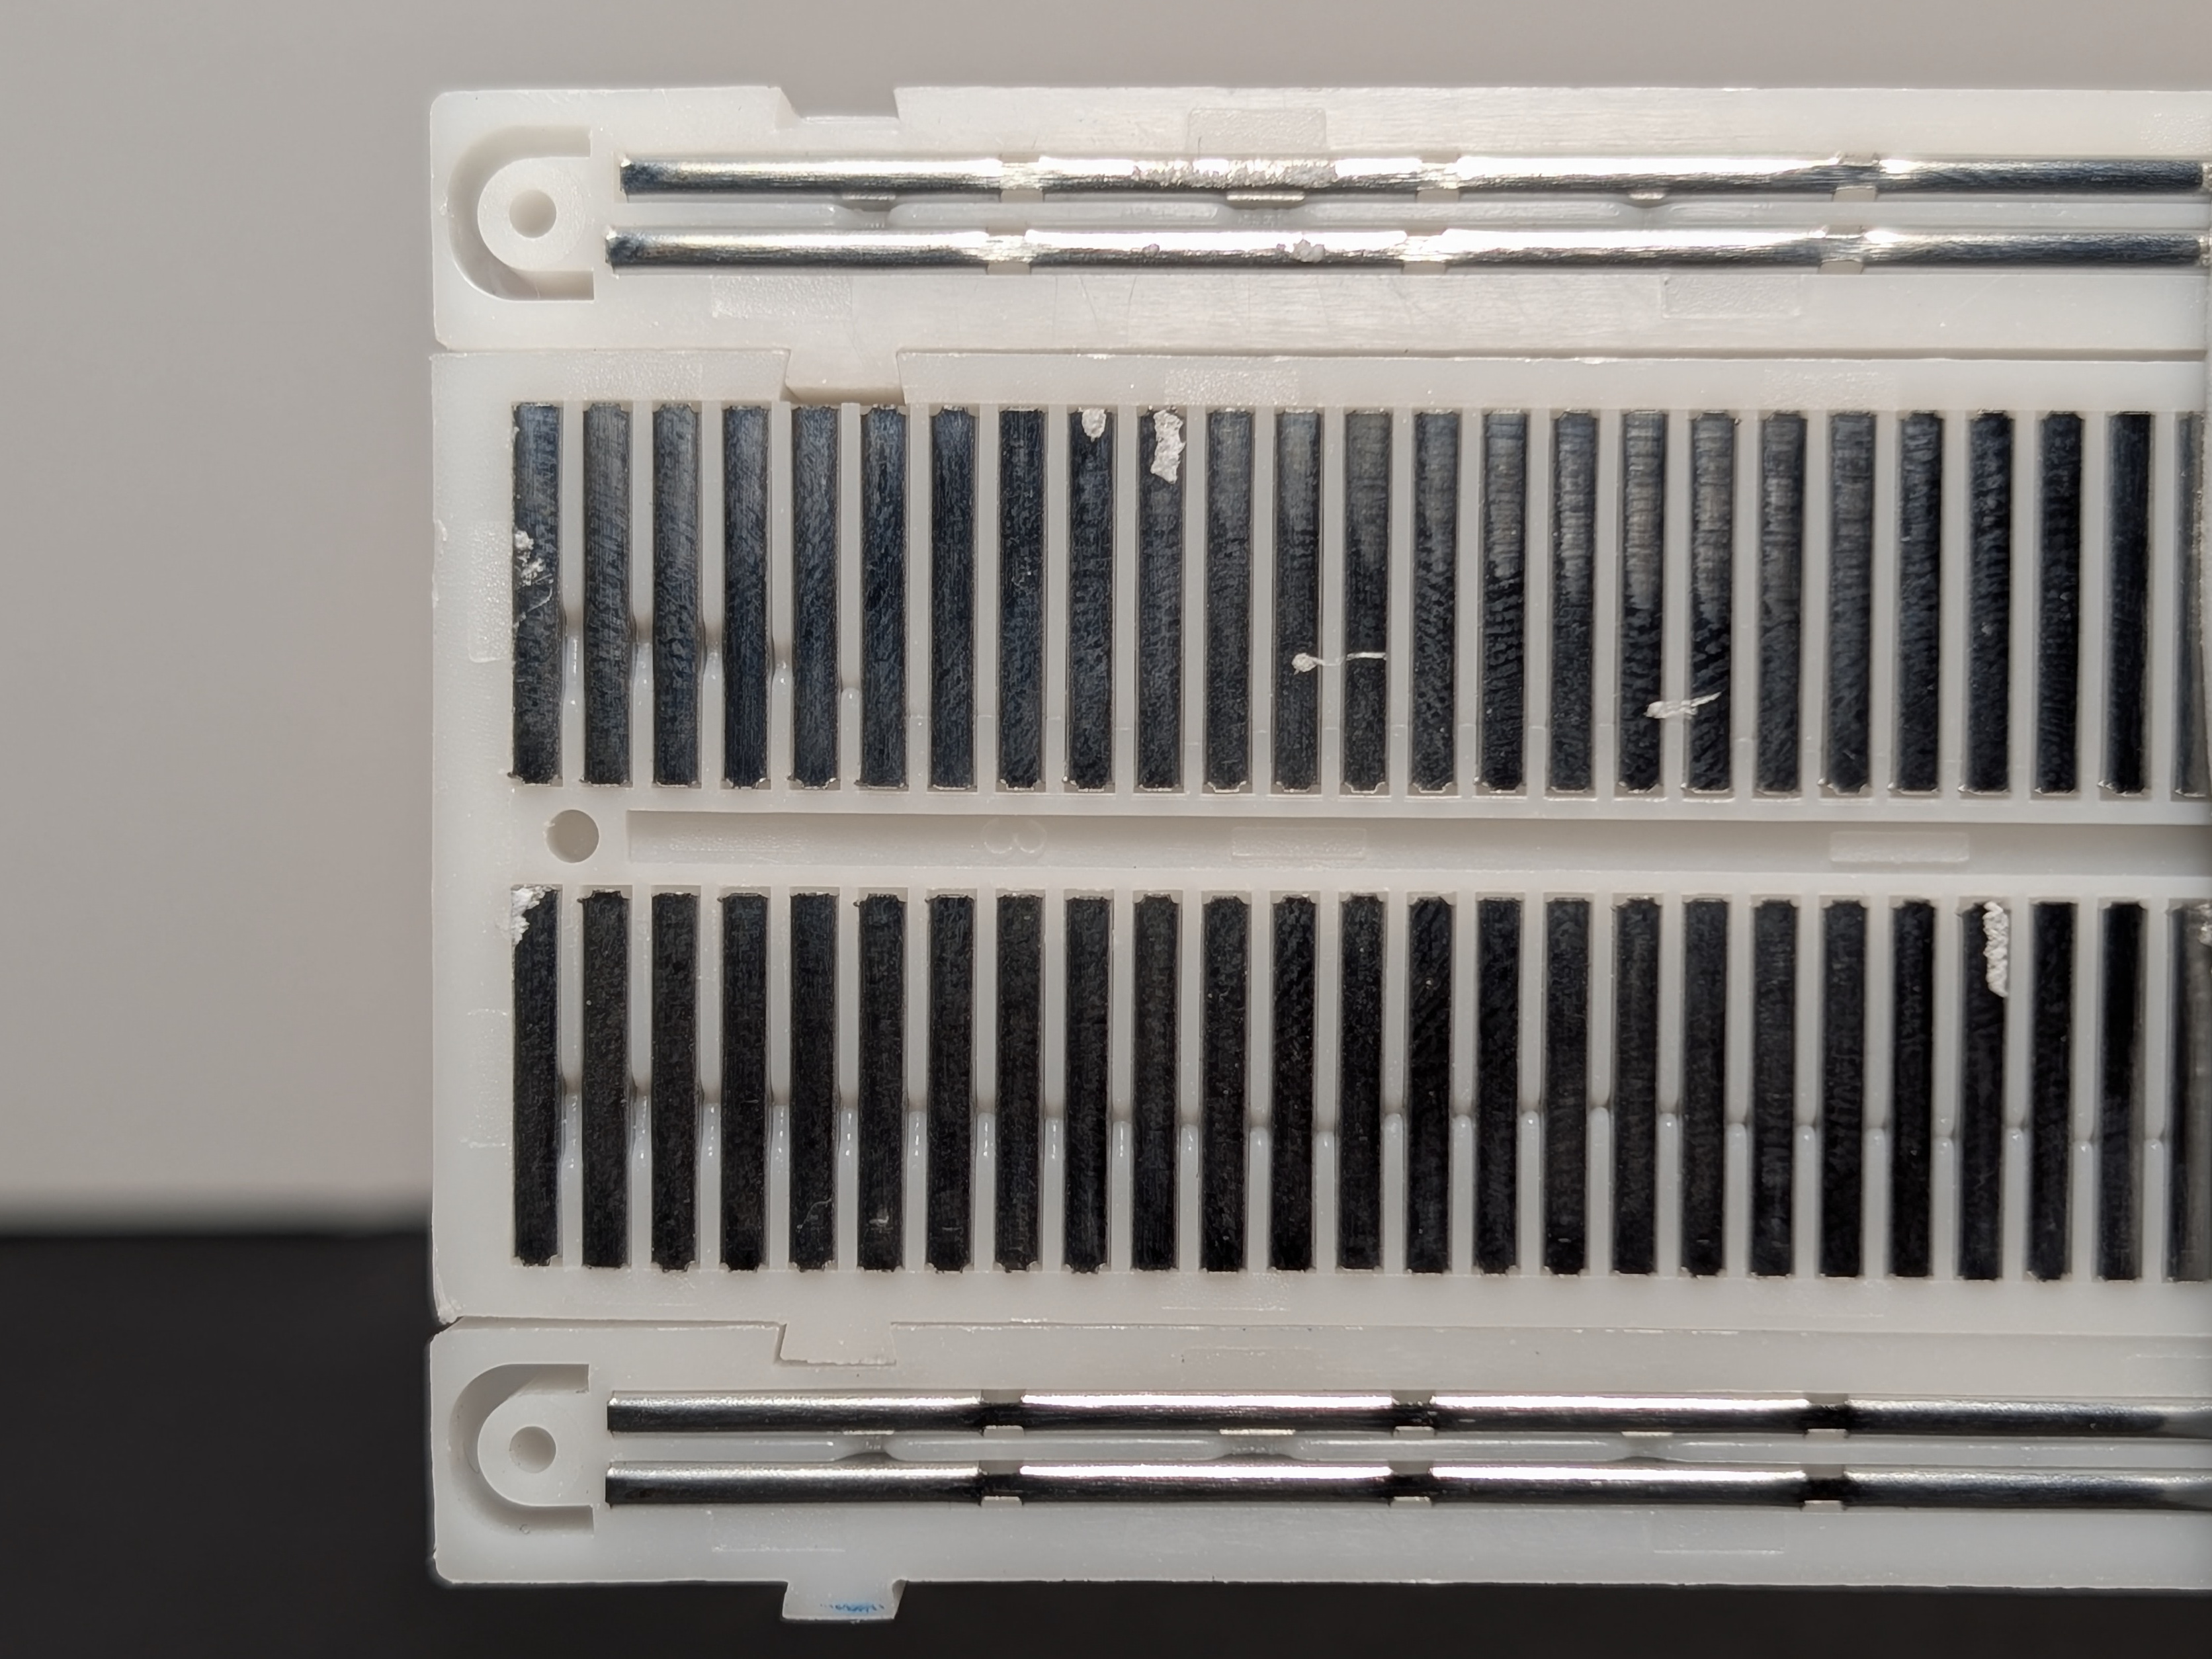
A breadboard lets you build circuits without soldering. You push parts and wires into the holes, and metal strips underneath connect some of those holes together.
It is basically a reusable place to build and test circuits.
Most breadboards have:
- long side rails for power
- short rows in the middle for connecting parts
- a center gap that helps you place chips and keep the two sides separate
The holes may look separate from the top, but many of them are electrically connected underneath.
LEDs
LED stands for Light Emitting Diode.
An LED lights up when current flows through it in the correct direction.
Important things to know:
- An LED has a long leg and a short leg
- The long leg is the anode (the
+side) - The short leg is the cathode (the
-side) - If the legs are hard to tell, the flat side of the LED marks the cathode (the short leg /
-side) - If you put it in backward, it will not light up
- If you connect it without the right resistor, too much current can damage it

Resistors
A resistor limits current.
In this kit, resistors are important because they help protect LEDs from getting too much current.
A resistor does not "use up" electricity. Instead, it limits how much current can flow in that part of the circuit.
The color bands tell you the resistor value.
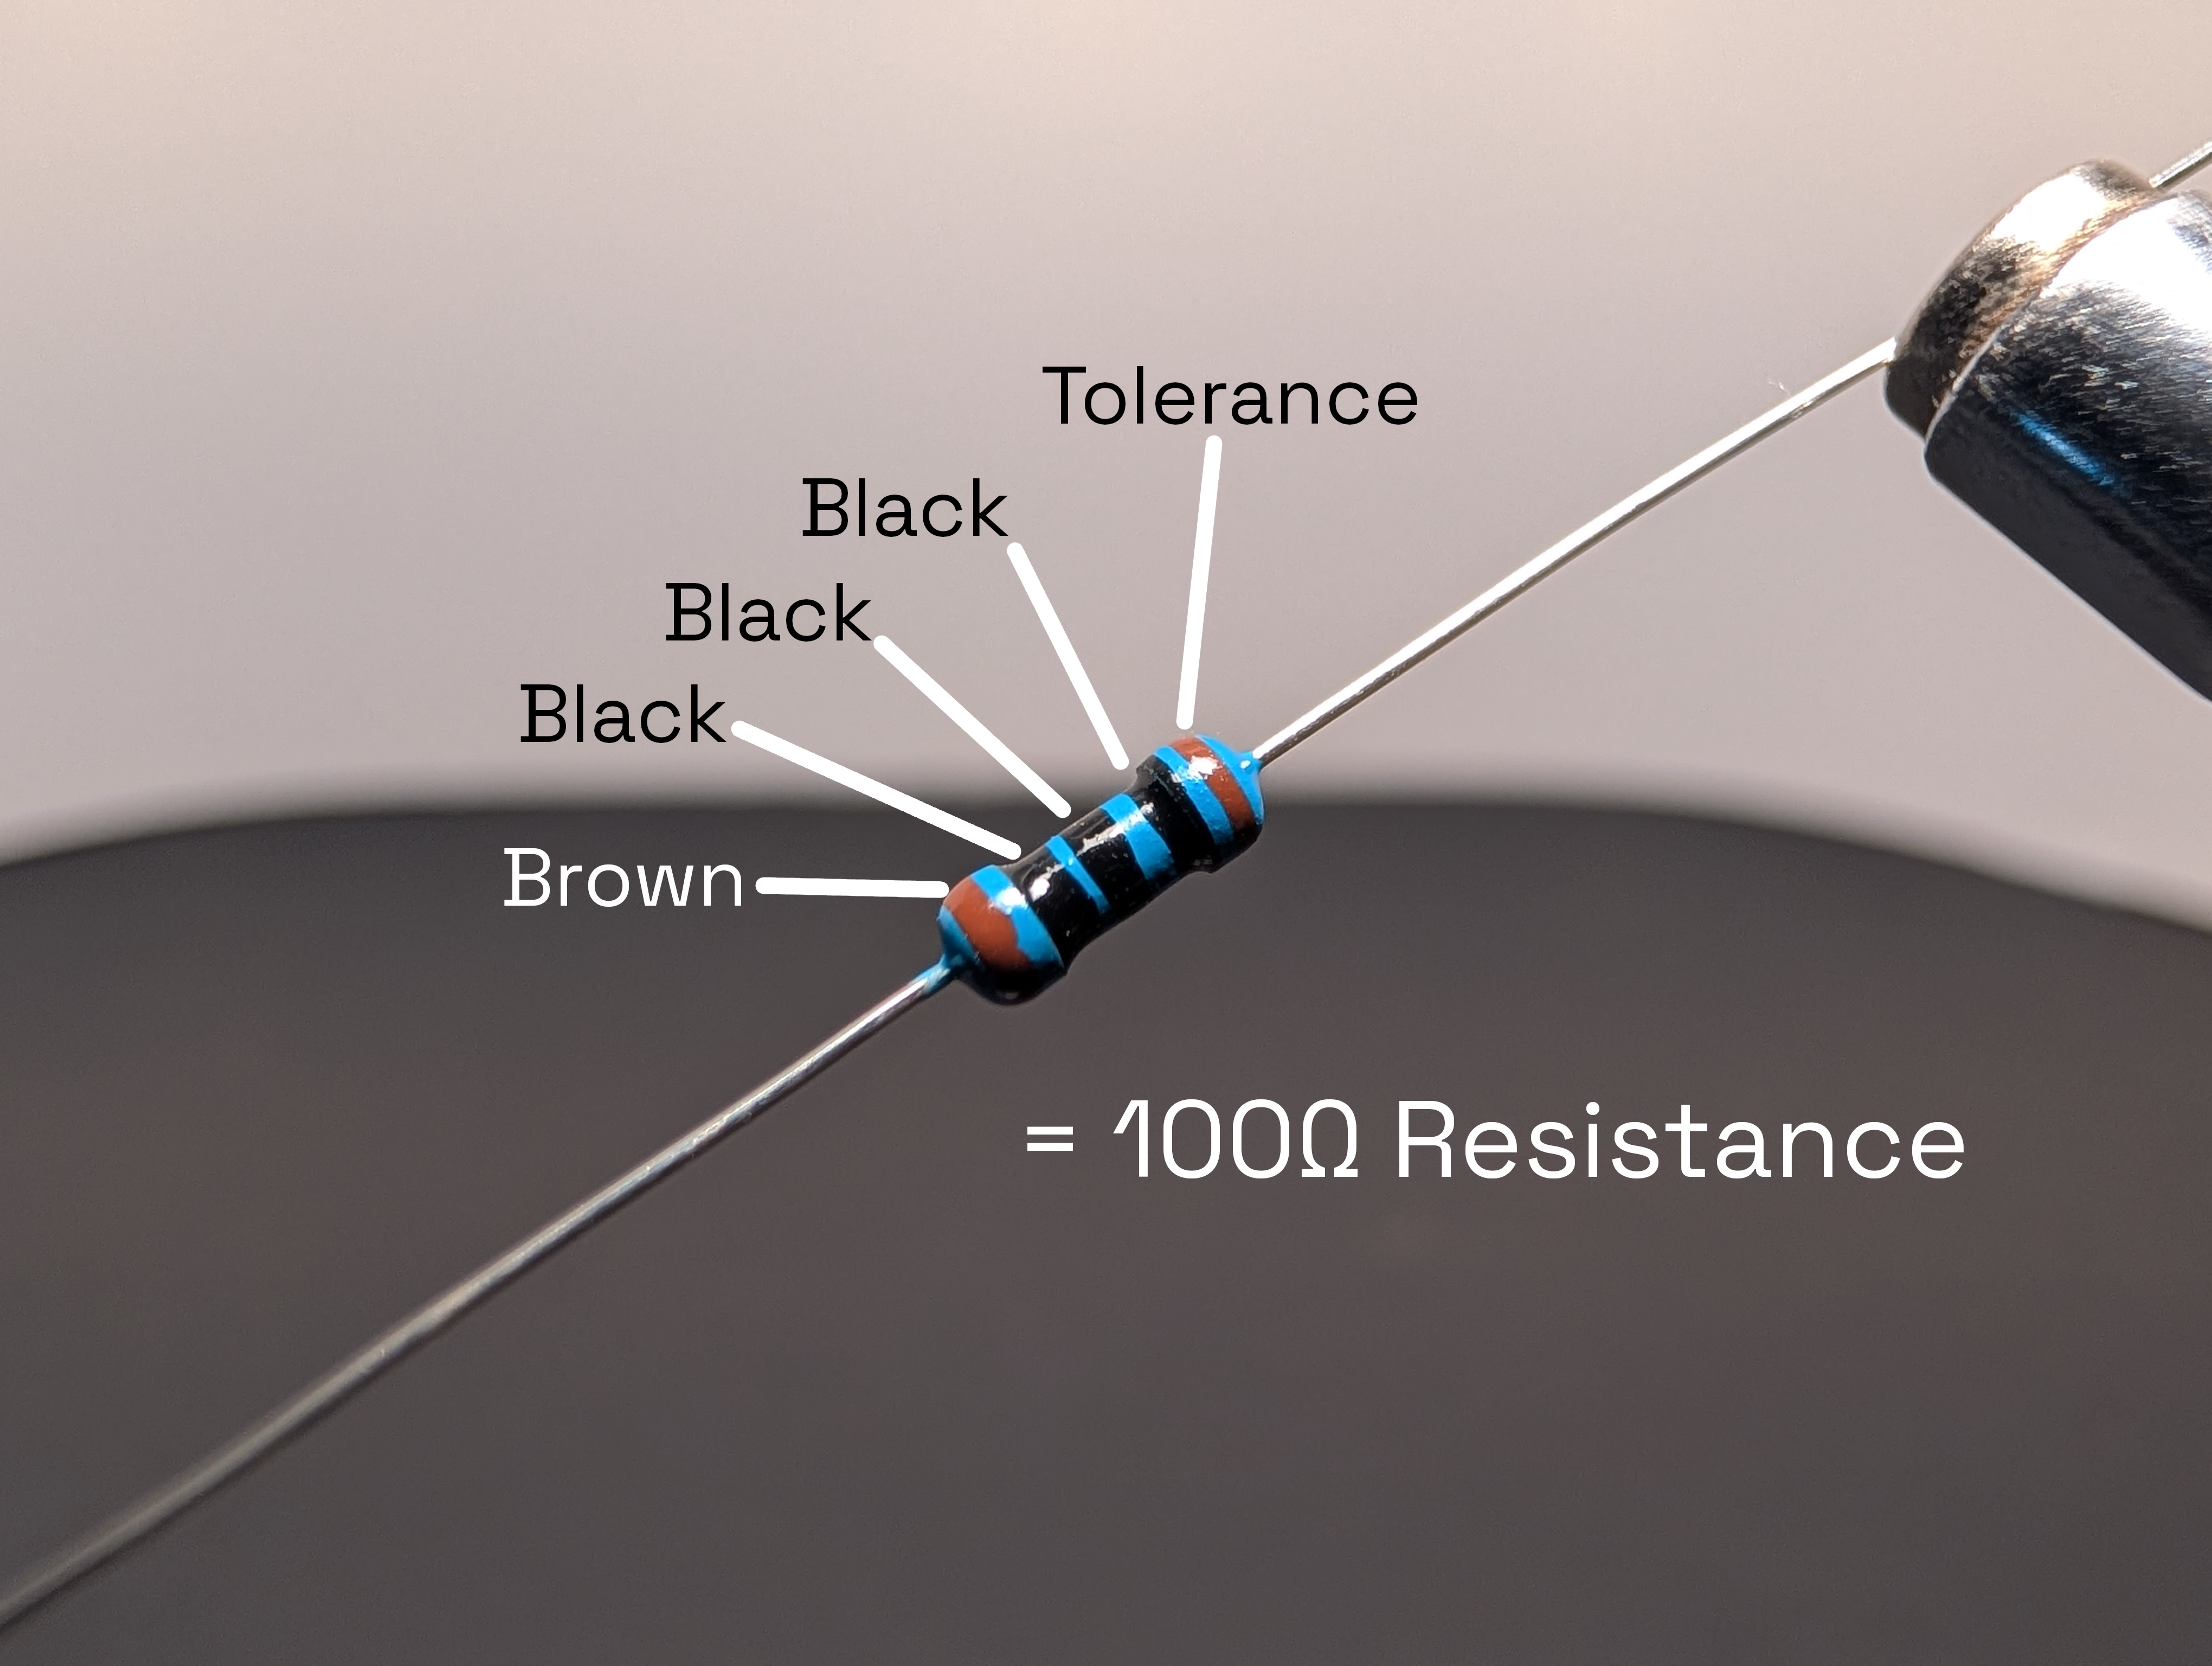
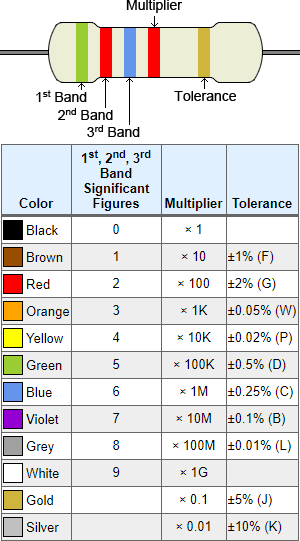
Resistor calculator at calculator.net
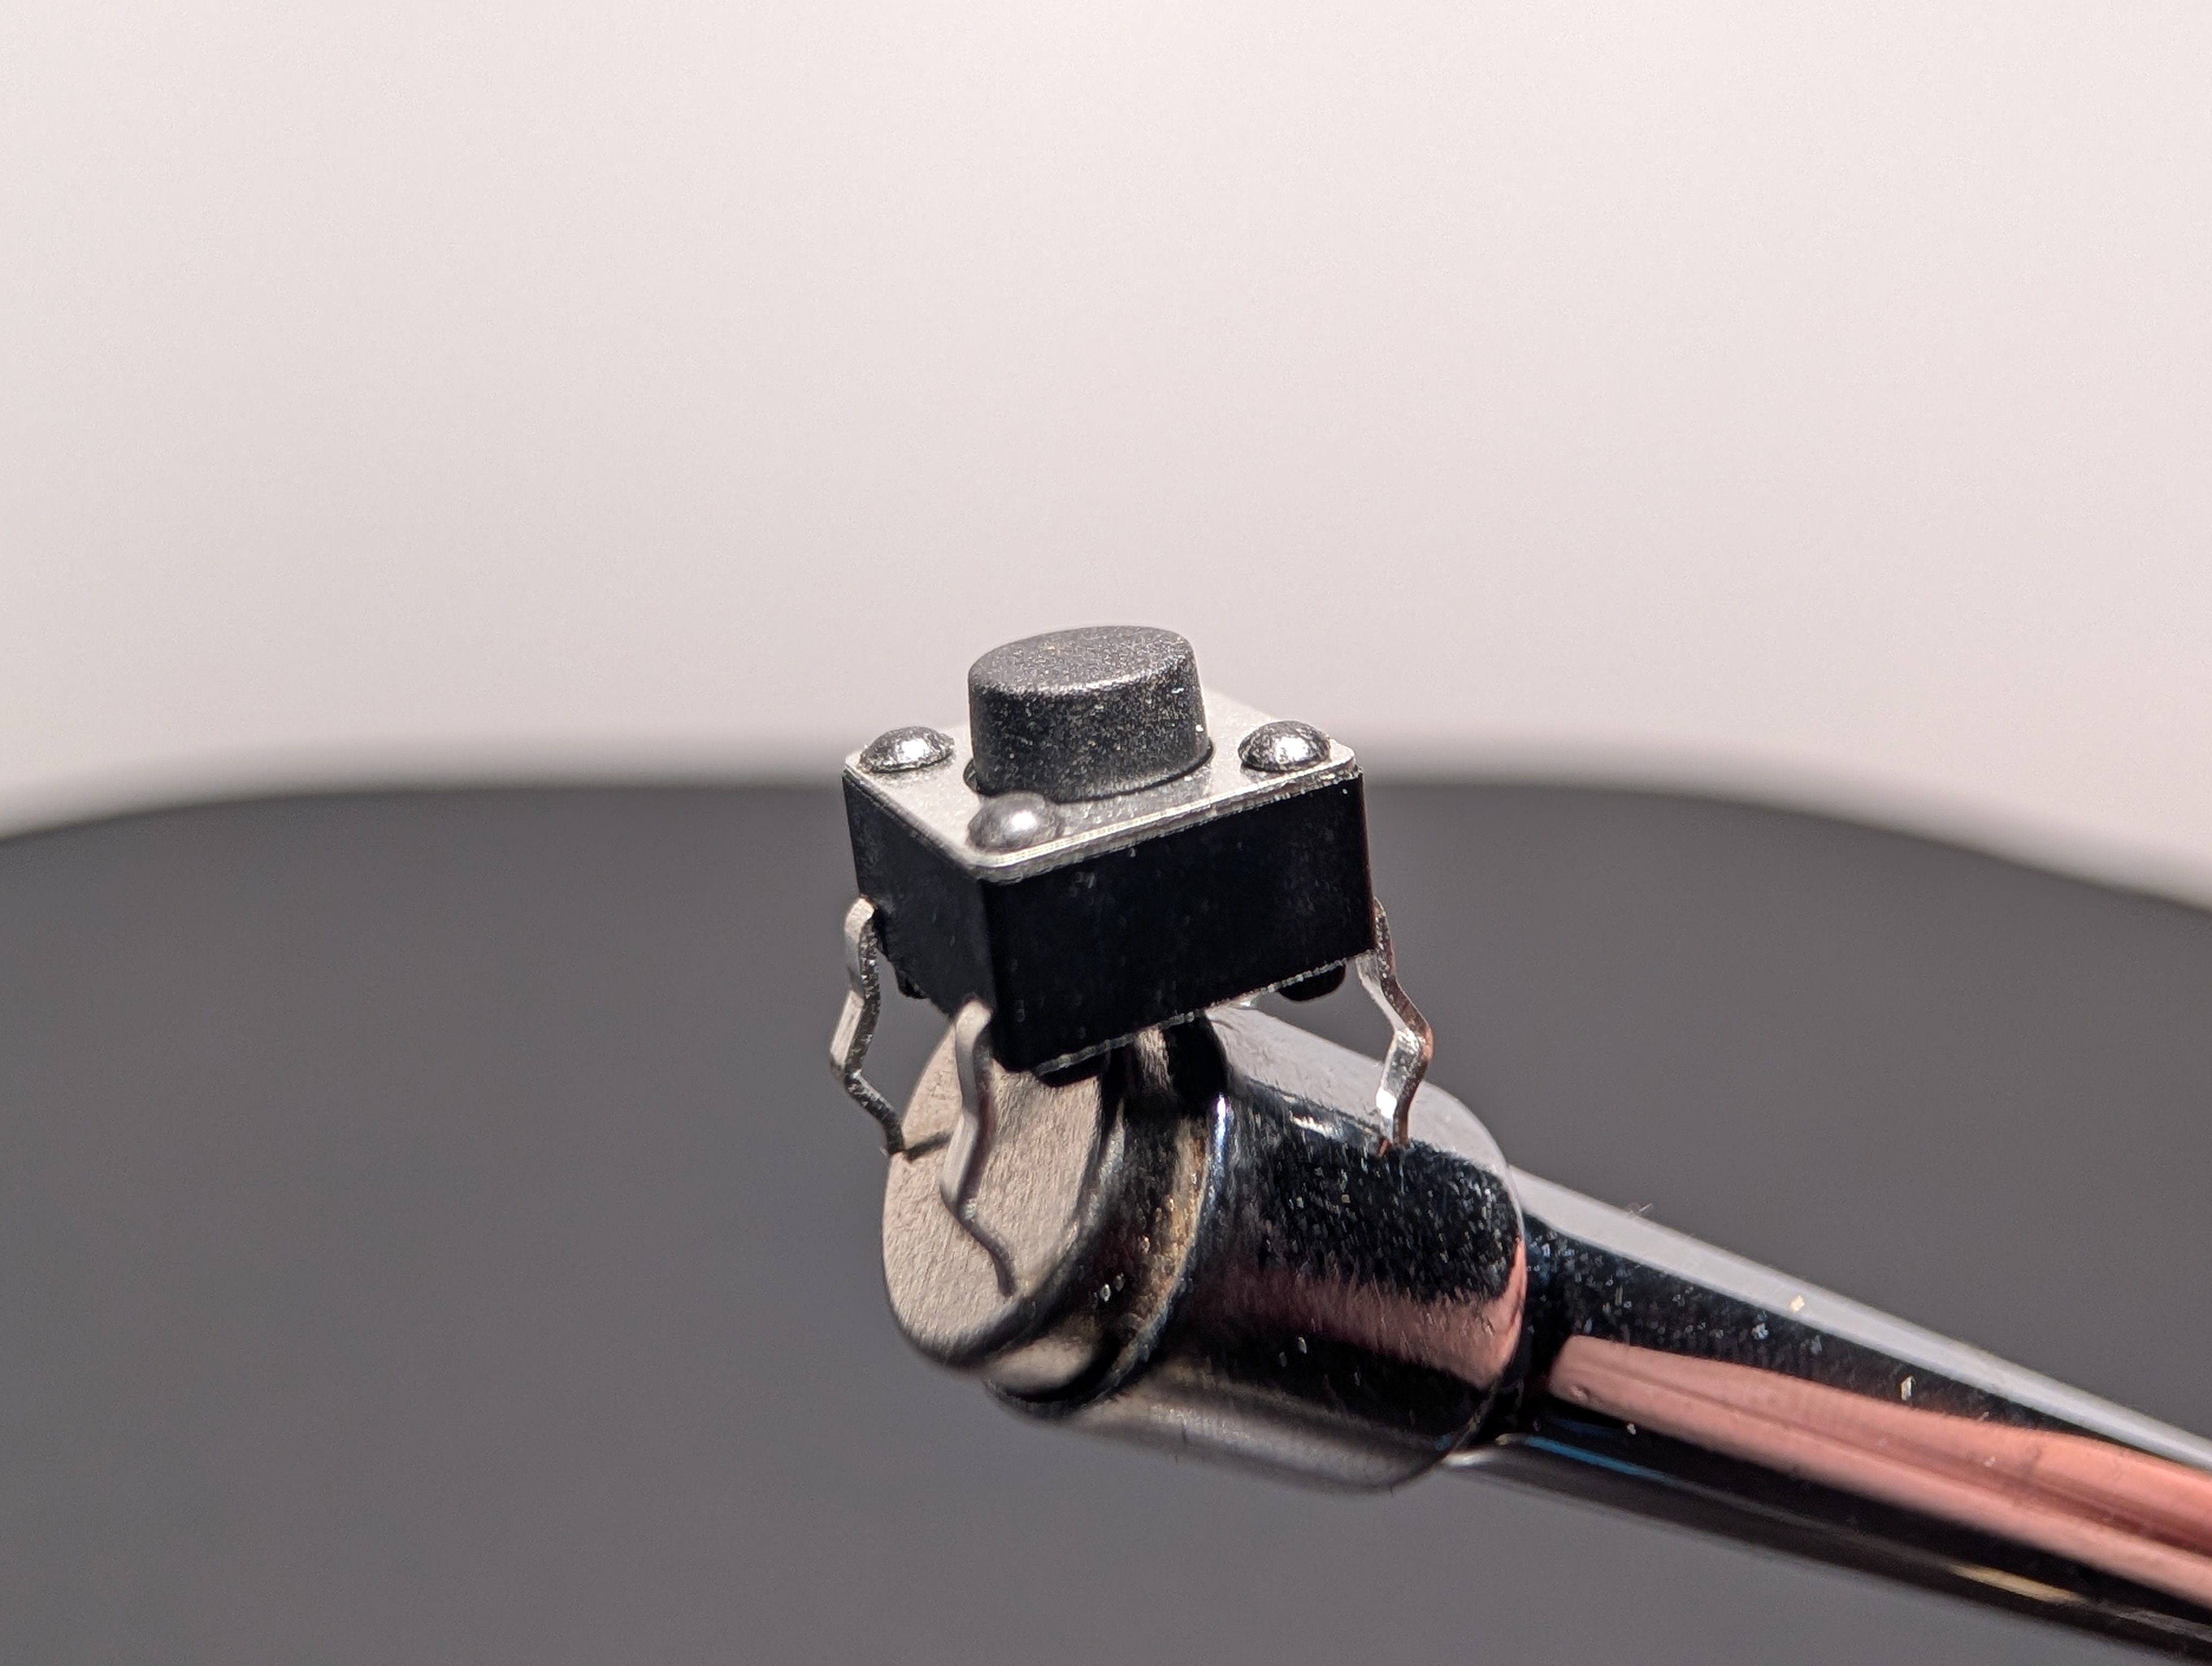
Pushbuttons
A pushbutton is a switch you can press with your finger.
Depending on how you wire it, a button can:
- connect two parts of a circuit when pressed
- send a signal to the RP2040-Zero
- let your code react to input
Buttons are useful in games and challenges because they let people control what happens.
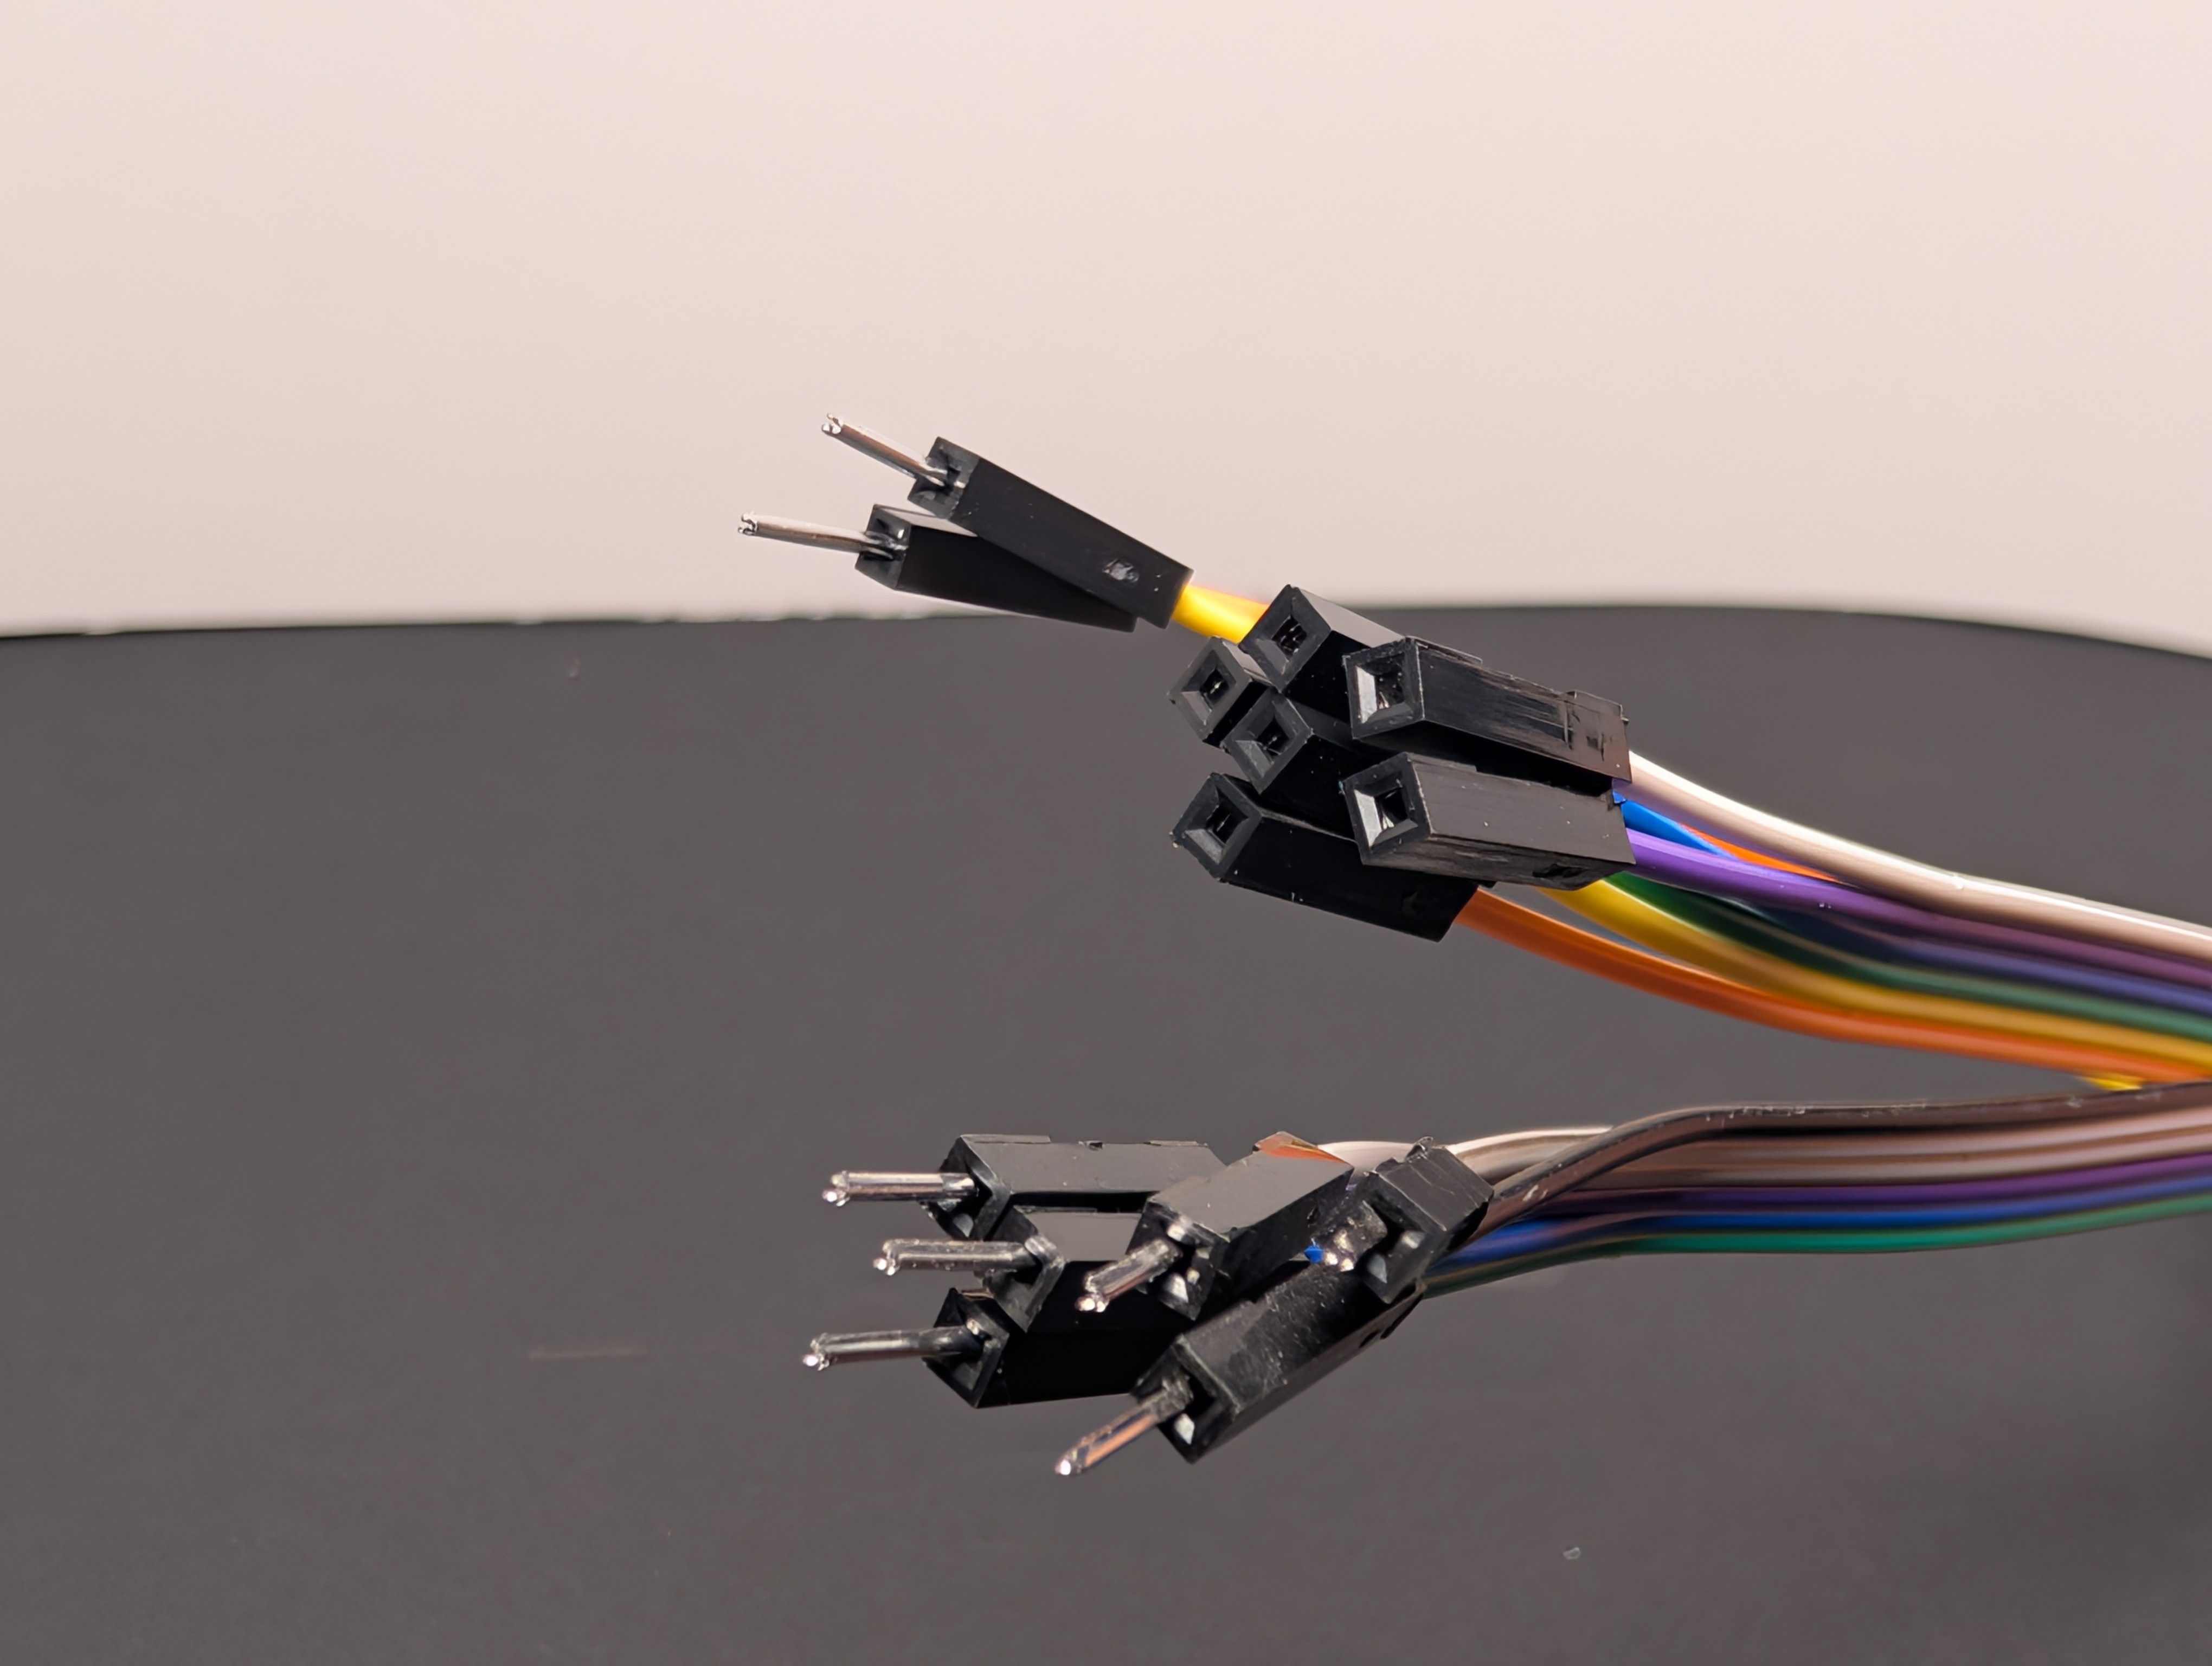
Jumper wires
Jumper wires are the small wires that connect one part of the circuit to another.
They are helpful because they make it easy to:
- connect the board to the breadboard
- move signals from one place to another
- test different layouts quickly
Putting the parts together
One simple way to think about the kit is:
- the RP2040-Zero is the brain
- the breadboard is the workspace
- jumper wires are the paths
- buttons are inputs
- LEDs are outputs
- resistors help keep the circuit safe and working properly